The Art and Craft of Mouldmaking
|
We made a Mould .... and a Plunger .... with Fenton!
Making Flowers of the World and the Woodsland Pine, by Glen Thistlewood Dedicated to the artists, artisans and craftsmen whose amazing skills created the beauties of Carnival Glass: Jon Saffell, Alan VanDyke, Don Cunningham, Bob Hill, Tracy Youmans, Mike Harter, Byron Butts, Mike Canfield and (the late) Frank M Fenton. The superb photos and much of the technical information are courtesy and copyright of (the late) Howard Seufer. We can never thank him enough. |
Pick up one of your favourite pieces of Carnival Glass. Almost certainly you admire it for its iridescence and its shape, but it's likely that you also find the pattern on it lovely too. The moulded designs are part of what defines Carnival, and differentiate it from other forms of iridised glass. Some patterns are bold and simple while others are subtle and complex; some patterns are cameo and stand proudly up from the surface of the glass while others are intaglio and deeply incised. There are well over a thousand patterns recorded and known in Carnival Glass, and we learn to recognise them as part of our collecting ethos and education.
|
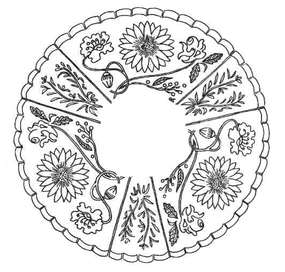
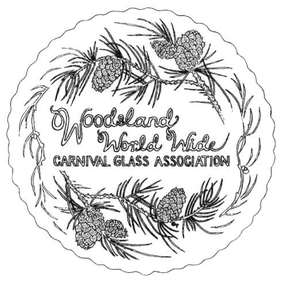
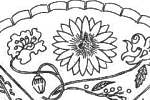
From these, my designs ....
|
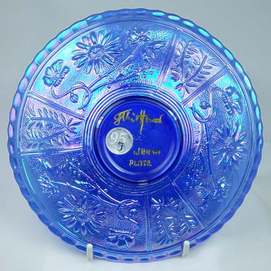
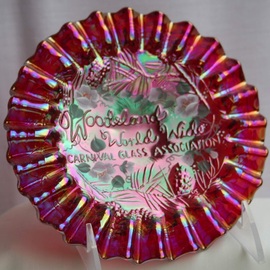
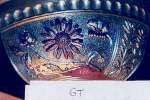
.... to this, Fenton's Carnival Glass!
|
But what about the processes involved in creating those patterns on glass? Most of us know how Carnival Glass itself is made: a gob of molten glass is gathered up and dropped into the mould, the plunger is brought down onto the molten glass and the piece pressed, turned out, iridised and finally allowed to cool in the lehr. I have simplified the description of the process here. My point is that we may be familiar with how press moulding works, and the skill of the glass workers who make and shape the glass is readily acknowledged. But what of those who designed and made the moulds? Consider the artistry and skill involved in all the stages from the inspiration behind the design, the sculpting of the pattern and subsequent tooling of the mould and plunger, are often overlooked.
In the late 1990s I had the opportunity to be involved in this process during the course of the creation of the commemorative glassware for wwwcga (the internet club, to be closed down in 2016). Our aim was to have an exclusive club design produced on Carnival pieces made by Fenton. We knew what motifs we wanted on our commemorative, and it was down to me to actually create the designs. No pressure! It sounded fairly straightforward until I actually sat down, pencil in hand and a pure white sheet of paper in front of me. Not only did I have to create the designs, but I needed to ensure that the size and shape fitted the scale and size of the glass object we were hoping for as an end product - a small bowl shape that could also be formed into plates, whimseys, etc. I soon found that pencil and paper were not the most important tools for the task. What I needed, and used most was an eraser. I did so many rough sketches, getting the design to fit the shape in the way I wanted. My natural inclination was to include a lot of detail, but this is absolutely not what was needed - the design had to be bold (more about this later, with special reference to stippling). |
The first design – of pinecones - was to appear on the front (inside) of the finished glass items and so it would be cut onto a metal plunger. Initially, our new plunger had to work with an exterior mould from Fenton's existing stock, a small 6 inch "Open Rose" bowl (in fact, an old Imperial mould). So my carefully scaled "Woodsland Pine" design for the plunger had to work in conjunction with the "Open Rose" design on the mould.
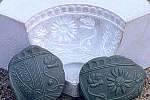
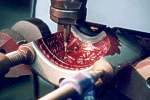
I produced my first finished design and sent it to Fenton's mould shop. A couple of days later I got a huge shock. Fenton were about to ship a blank plaster cast to me (in the UK), as they were expecting me to cut the new design into the plaster blank! And please note - as the finished appearance of the pattern was going to be cameo (raised off the surface of the glass) the design would have to be cut into the plaster, in reverse, so as to appear as intended on the finished glass item. Of course, I couldn't do that, I had no training or experience for it, but it was at that moment that I fully realised the incredible skill of the mould makers. Not just those of today, but also those of years gone by. The skilled craftsmen and artisans who not only produced the amazingly beautiful designs we see on Carnival, but who also transferred those designs onto solid metal moulds and plungers, cutting them into the surface so skilfully.
Fortunately for me, I didn't have to even attempt that incredibly skilful part of the process. To cut a long story short, Fenton realised the misunderstanding and took over those crucial parts of the process (in fact the plunger was made by Island Mould Company at Fenton's request) and in September 1998 our first commemorative piece was made, then officially "unveiled" at the club's Premier Convention in Las Vegas in January 1999. We didn't rest on our laurels, as the club wanted the exterior pattern! We needed a new design / new mould to replace the "Open Rose" that would work with the design on the plunger.
The whole process (right through from design to finished glass items) was expertly documented by our Fenton contact - Howard Seufer - and it is these amazing archive photos and information that you can now see on the pages of this feature, that so astonishingly capture the fascinating skill and artistry of the mouldmakers and craftsmen involved. Follow the process through the steps below and enjoy the photos.
And again, I want to put on record my gratitude and debt to (the late) Howard Seufer who not only took all the fantastic photos shown here, but who also mentored, advised and acted as go-between between me and Fenton at every stage along the way.
Start the journey - The Design


