Making a Press Moulded Carnival Glass Bowl
The processes, the people and the glassmaking tools involved.
By Glass Engineer Howard Seufer, with additional material provided by Glen & Stephen Thistlewood
By Glass Engineer Howard Seufer, with additional material provided by Glen & Stephen Thistlewood
|
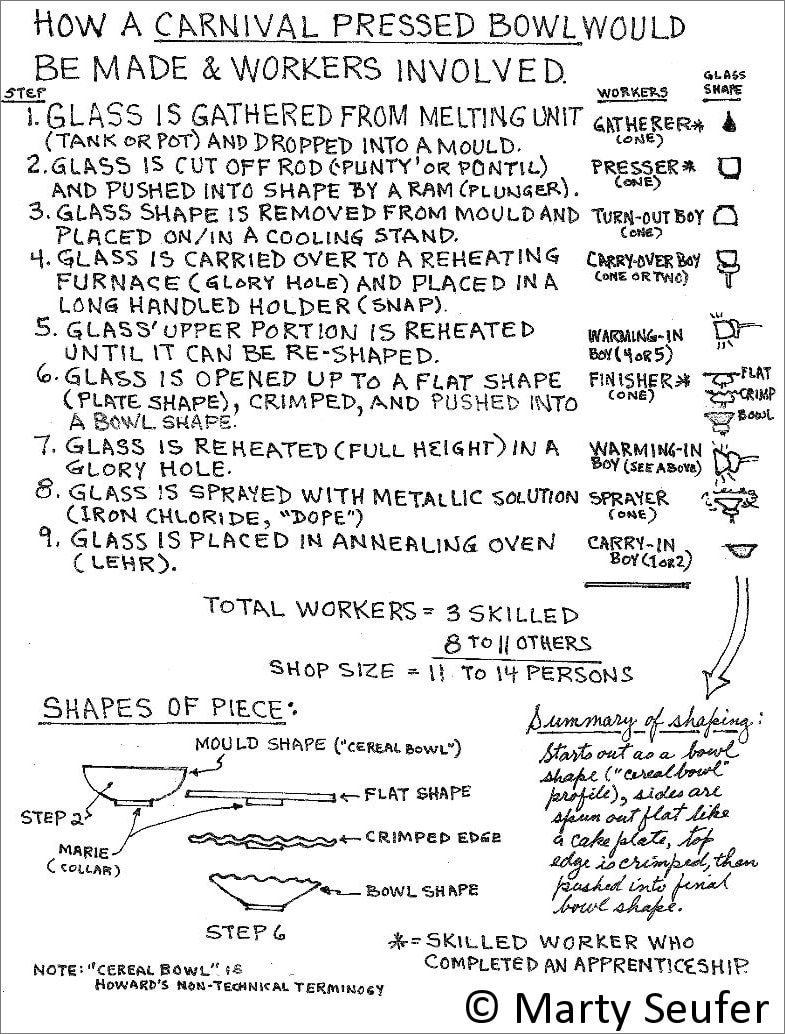
Howard was extremely well-known and well-respected for his expertise in the field of glassmaking. He was also a wonderful educator who freely shared his considerable knowledge with collectors. His presentations are legendary, especially in his ability to explain complex glassmaking processes and techniques in a way that was instantly understandable. This is one of Howard's many information sheets. It is an original, and we are not sure if it was ever used as an actual handout at one of his presentations. It explains how a pressed (and shaped*) Carnival Glass bowl was made - the sequential steps in the glassmaking process, the actions and the glassworkers involved in each step, and the tools that they used. * Carnival bowls were (for the most part) shaped in the way Howard described. However, it is worth noting that some bowls were "as moulded" - namely that their shape was not changed after they had been removed from the mould. In these cases, Steps 5 and 6 described below, would not be necessary. |
This handout was a summary of Howard's presentation but, as anyone who attended one will know, he always used many illustrations and so much more information. We cannot replicate this here, but perhaps we can go some way towards elaborating what Howard would undoubtedly have added in his talk.
|
Step 1: Glass is gathered from the melting unit.
There is a key process before this Stage, namely the making of the glass in the melting unit (the glass batch). Glass factories were fairly secretive about the "mix" that went into the batch, but generally speaking it composed of silica sand (the main component), an alkaline material (sodium or potassium carbonate to reduce the melting point), lime, cullet (reusable broken glass), and a variety of colouring/decolouring chemicals (depending on the intended outcome). The glass had to be melted to a precise fluidity - a skilled judgement call - too viscous and it would not press into the extremities of the mould; too fluid and it would not adhere to the gathering rod (punty or pontil).
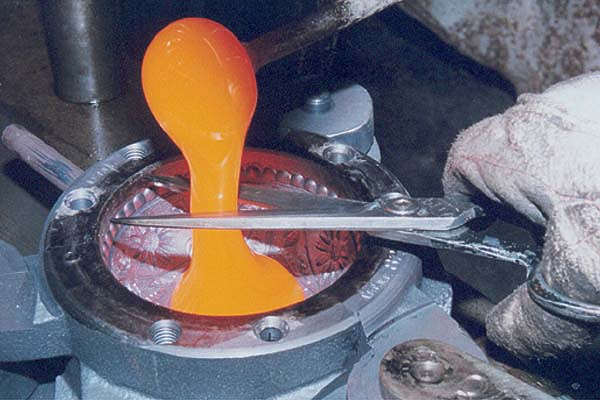
Step 2: Glass is cut off rod ... and pushed into shape by a ram (plunger). Cutting off an amount of molten glass (the glass "gob") sounds simple, but it is another skilled judgement. The amount dropped into the mould has to be precise. If too much is dropped in, the surplus molten glass will prevent the plunger from fully entering the mould; too little, and there will be insufficient to fill all the space in the mould, so the pattern will be imprecise or the glass item will have missing elements. |
A carefully-sized gob of molten glass is cut off
a rod and dropped into the mould. |
|
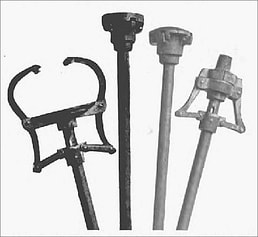
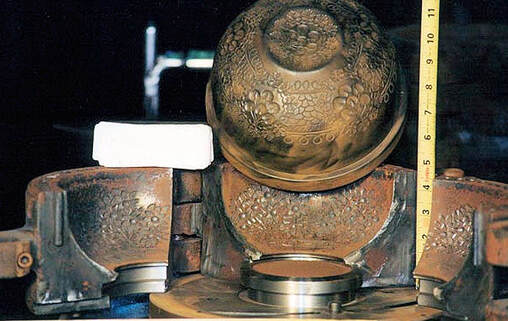
Pressing the plunger into the mould required physical effort by the "presser"; once again it was a skilled judgement call on how much pressure to exert, in order to achieve a crisp finish to the pattern on both the mould (which makes the exterior pattern on the bowl) and the plunger (making the interior pattern). On the right is a Fenton mould assembly from the Classic Carnival era. The plunger creates the interior pattern (Cherry Chain), and the mould creates the exterior pattern (Orange Tree). This mould is in three hinged sections which close around the plunger (meaning that there will be three mould seams). The assembly is completed with a bottom plate, a top ring (which creates the basic shape of top edge) and a locking pin to hold the whole assembly together). Step 4: Glass is ... placed in a long handled holder (snap). A variety of snap tools was used, depending on the shape and size of the base of the piece of glass being worked. Here are some examples (source Google Images / University of Michigan). Step 6 [1]: Glass is opened up to a flat shape (plate shape) ...
This stage was not always necessary when the finished article was to be a bowl shape. Note however that, if the finished article was to actually be a plate, this in one of the ways in which it was achieved - a moulded bowl shape was spun out to make a plate. |
Above: a Fenton mould assembly (Cherry Chain plunger / Orange Tree mould).
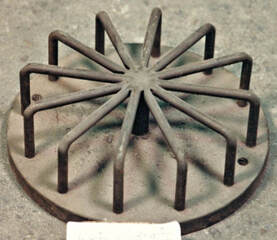
Below: a Fenton 12 point Crimp tool Pictures courtesy of the Fenton Family and Fenton Art Glass Co. |
|
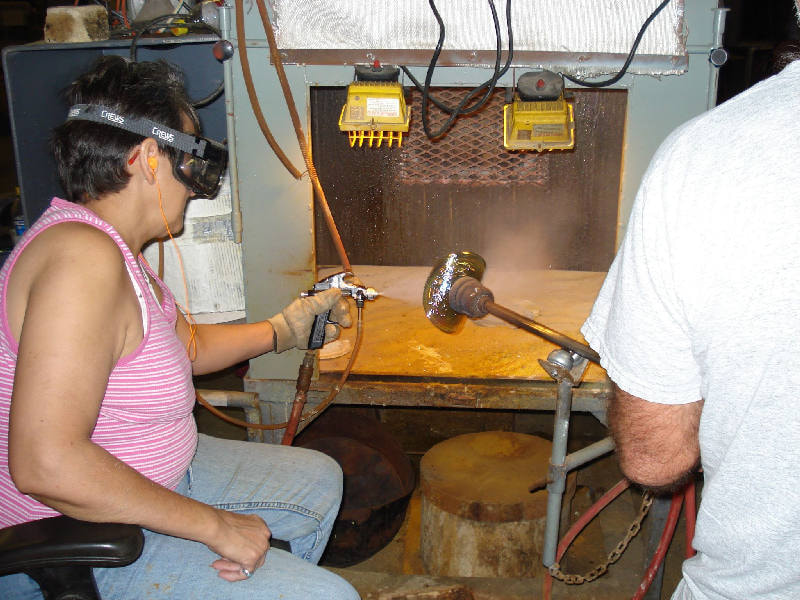
Step 6 [2]: [Glass is] ... crimped. Whilst crimping could be done by hand, a more satisfactory and labour-saving way to achieve a consistent and even crimping was to use a foot or hand operated crimping device. Above on the right is a Fenton "12 point Crimp" which was floor mounted; whilst the glass was still hot and malleable, the item was pushed down onto the crimp, to produce a perfectly-spaced twelve point crimp /ruffle. Fenton used a whole variety of these devices, depending up on the effect that was to be achieved, and we look at many of these crimping tools in another wonderful "Howard Seufer Presents" in which the whole topic of Crimping and Shaping is explained: Handmade Pressed Carnival Glass Step 8: Glass is sprayed with metallic solution (iron chloride "dope"). Undoubtedly, iron (or ferric) chloride was used most regularly; it produced the orange colouration that we call marigold Carnival. There were other metallic sprays used, and glassmakers had their own formulae, often well guarded! We explore this in more detail here: What is Iridised. The picture on the right shows a piece of glass (it is being held on a snap), whilst the glassworker on the left applies the metallic spray to add iridescence. |
It was taken on the factory floor in modern-day Fenton. The situation is very different to the days of Classic Carnival. The metallic spray has a different formula (safe and environmentally friendly), health and safety procedures are used (the spay is applied in a way that the surplus spray is sucked up and extracted), and glassworkers on the factory floor in the Classic era were exclusively male. However, the skills involved, the processes and the techniques involves, and the finished iridescent effects are timeless.
It was taken on the factory floor in modern-day Fenton. The situation is very different to the days of Classic Carnival. The metallic spray has a different formula (safe and environmentally friendly), health and safety procedures are used (the spay is applied in a way that the surplus spray is sucked up and extracted), and glassworkers on the factory floor in the Classic era were exclusively male. However, the skills involved, the processes and the techniques involves, and the finished iridescent effects are timeless.
|
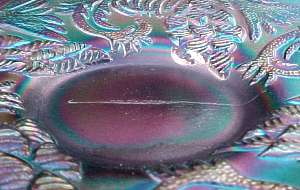
Shear Marks are often misunderstood. They are not flaws, and they are not associated with defects on the mould or straw in the mould. They are in fact a feature of handmade pressed glass. All is explained here: Shear Marks
Magical Moulds! This page is the gateway to all our information and articles about the unsung art - and skill - of mould making. Read about making moulds in Fenton and in Sowerby. Heard about Hipkins Novelty Mould Shop? They made moulds for the major Classic Carnival Glass producers, and they were instrumental in the failure of the Millersburg factory! We also tell the story of the revival of two Dugan classics, Butterfly and Tulip and the Christmas Compote.
Thanks to unrivalled access to the master glassmakers at Fenton (arranged, photographed and documented by Howard Seufer, naturally!). Dedicated to the artists, artisans and craftsmen and their whose amazing skills, we show - step by step - how an idea for a piece of Contemporary Carnival Glass progressed from Glen Thistlewood's concept and design through to actual production.
|
This article is part of a series written specifically to answer the Frequently Asked Questions and to deal with the many Myths and Misunderstandings about Carnival Glass. Find it here: All About Carnival Glass.

